Article · Jan 11, 2024
How to Verify a user's email in the Bubble app using Postmark?
Learn the step-by-step guide on email verification using Postmark in your Bubble app. Strengthen security and enhance user trust effortlessly. #NoCode #Post
As a passionate no-code developer, I understand the importance of creating seamless user experiences while maintaining robust security measures. In this blog post, I’ll guide you through the process of implementing email verification in your Bubble app using the Postmark service. Email verification is a crucial step to ensure that your users are genuine and to enhance the security of your application.
Postmark is a reliable email delivery service that ensures your emails reach users’ inboxes promptly. To start, create a Postmark account and set up a new server, obtaining the Server Token for integration with your Bubble app.
I migrated FoodIWant’s transactional email layer from SendGrid to Postmark for exactly these deliverability reasons. The Postmark migration story sits inside the marketplace developer page for the production angle.
How to set up a ‘Postmark’ account?
Well, who can tell you better this than postmark themselves? Follow Postmark’s step-by-step guide to setting up a Postmark account.
How to set up a ‘Postmark’ in the bubble application?
We can do this via a plugin as well as an API connector. For this article, I am going to use the Rich Postmark Emails plugin on Bubble.io.
Now here are the steps:
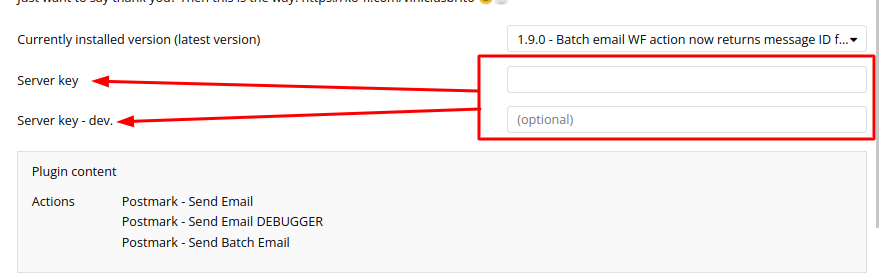
1. Install the ‘Rich Postmark Emails’ plugin in your bubble application
2. Go to your postmark account and copy server API Tokens
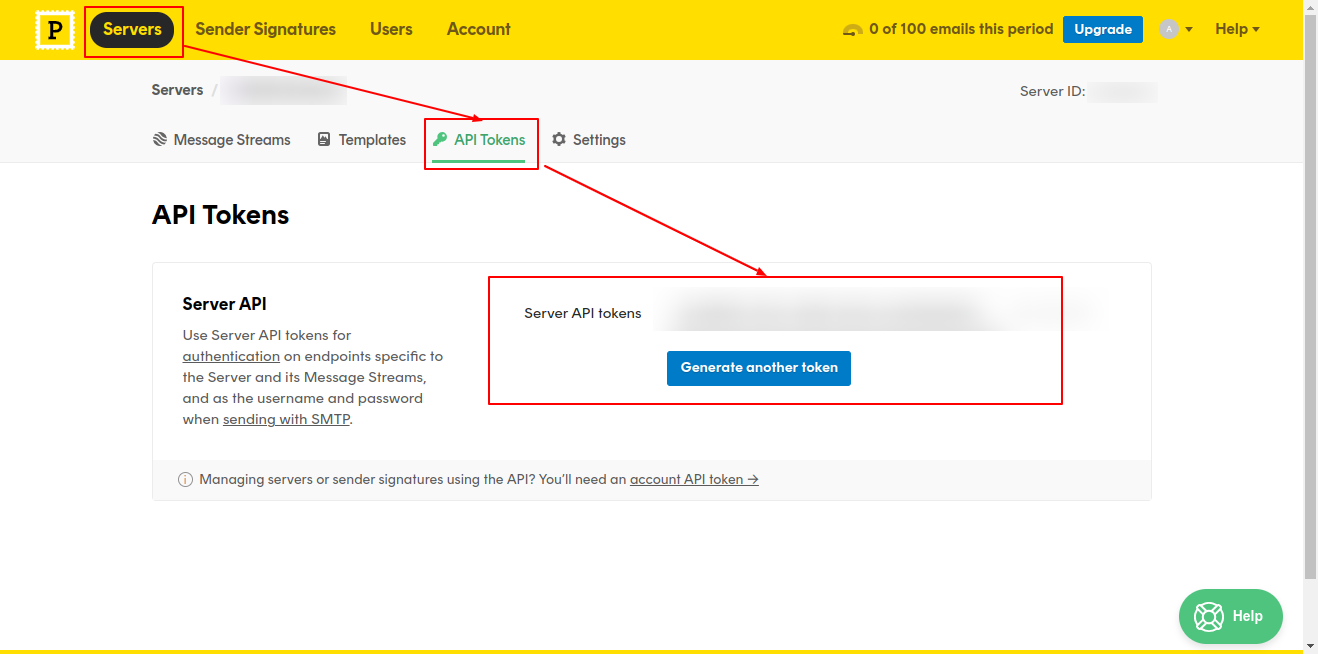
3. Paste this token into your application’s Rich Postmark Emails plugin
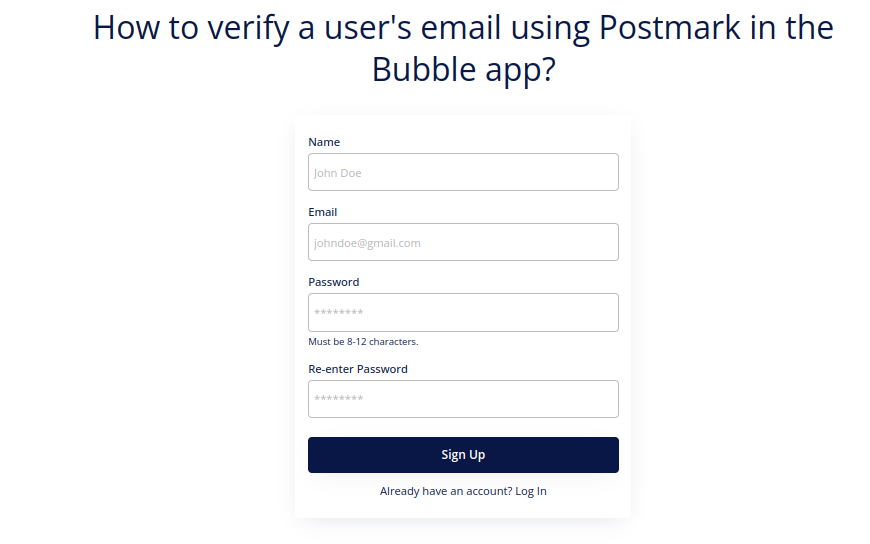
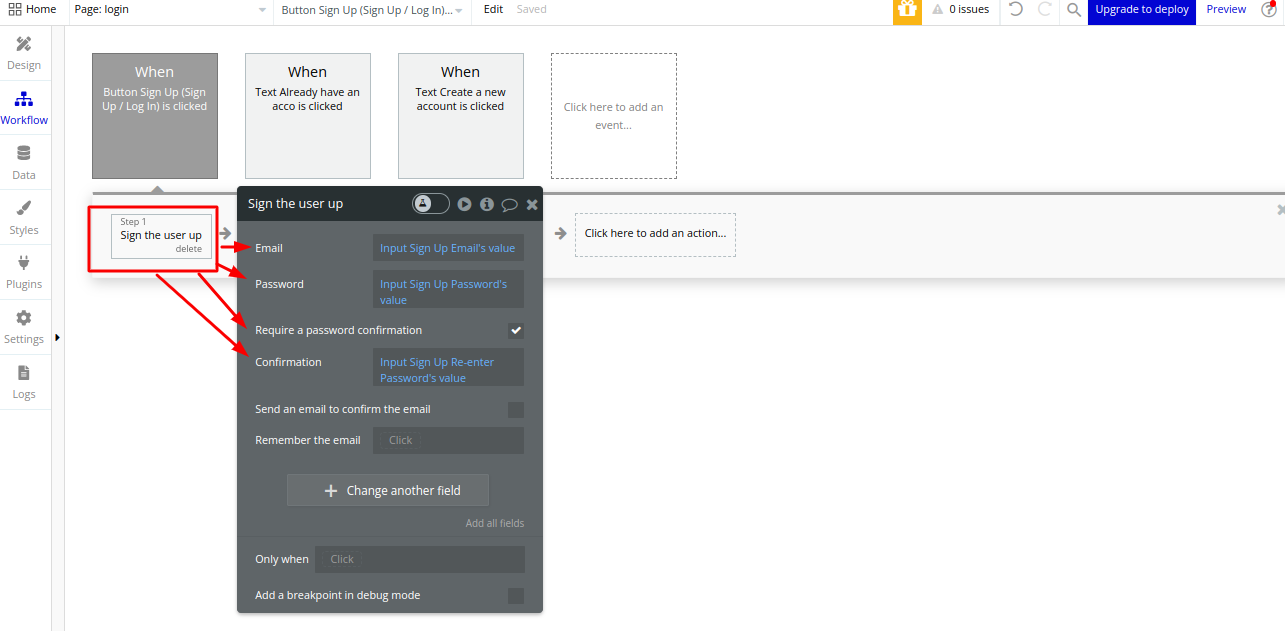
4. Create Sing-up UI and setup signup workflow
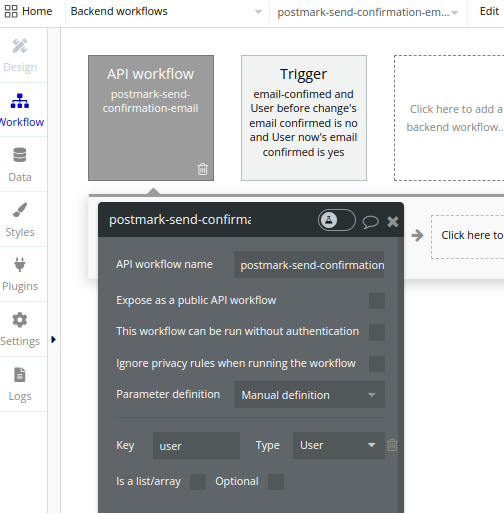
5. Create a Backend workflow for sending email for email-confirmation
- Create ‘New API Workflow’ from Backend Workflows
- Named that workflow ‘postmark-send-confirmation-email’
- Define ‘User’ type user as a manual parameter
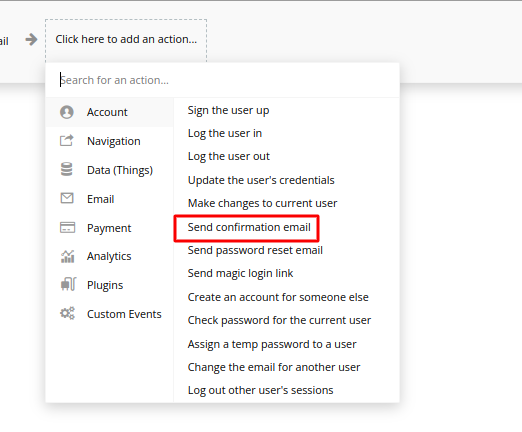
- Add ’ Send confirmation email’ action to this new API workflow
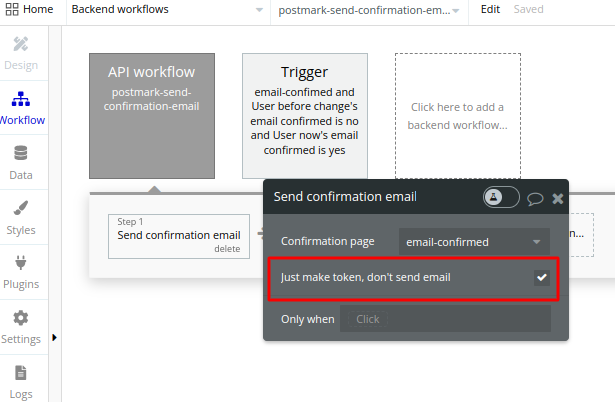
- Define the page you want to navigate to the user once the user confirms the email address and mark ‘just make token, don’t send email’ true
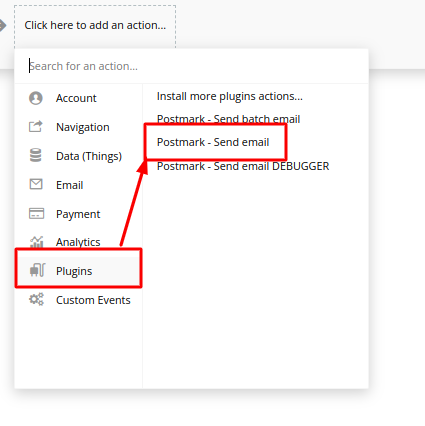
- Add ‘Postmark -send email’ action next
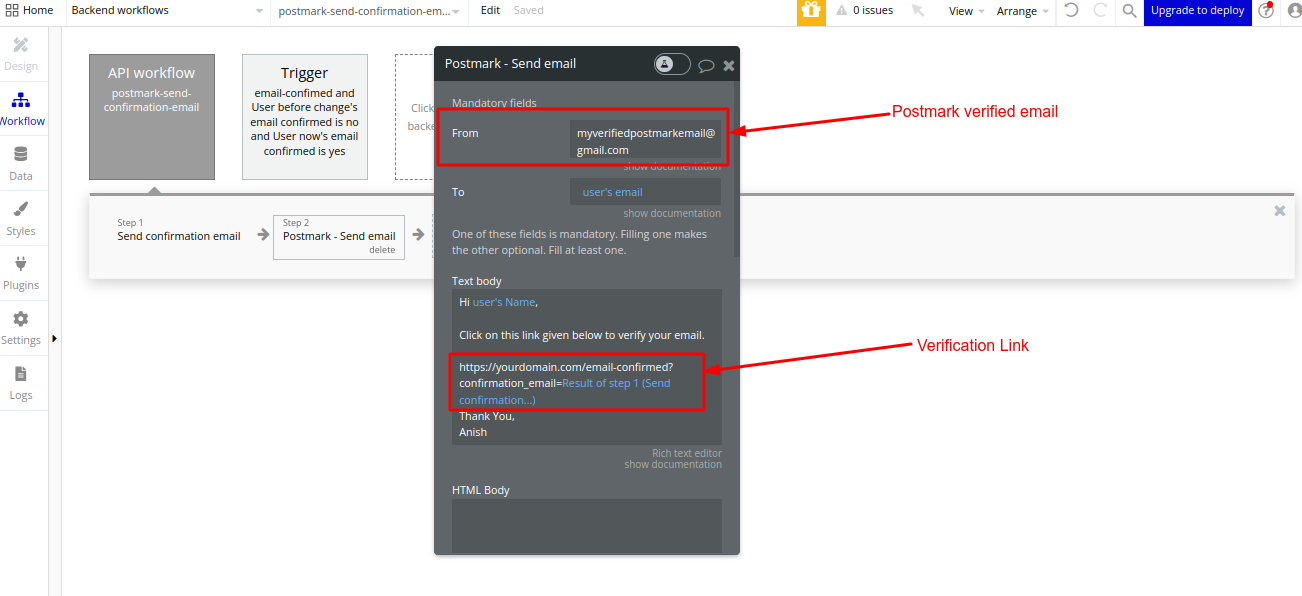
- Setup the email keeping the following things in mind:
1. From is always the email ID that you have verified with ‘Postmark’.
2. The Verification Link format is always the given below:
https://yourdomain.com/\[CONFIRMATION\_PAGE\]?confirmation\_email=Result of Step 1 (send confirmation email)
6. Create a Log for email confirmation in the database to check and verify the success of the email verification setup
- Create a database trigger workflow in the backend workflow
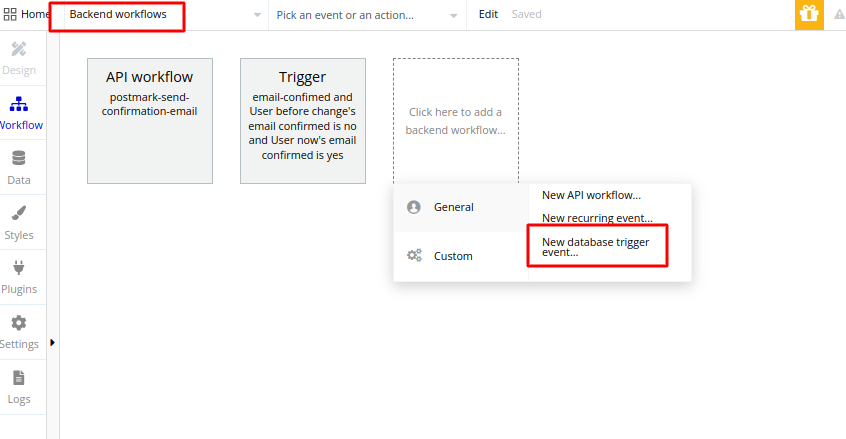
- Setup the database trigger which checks the ‘User’ data type
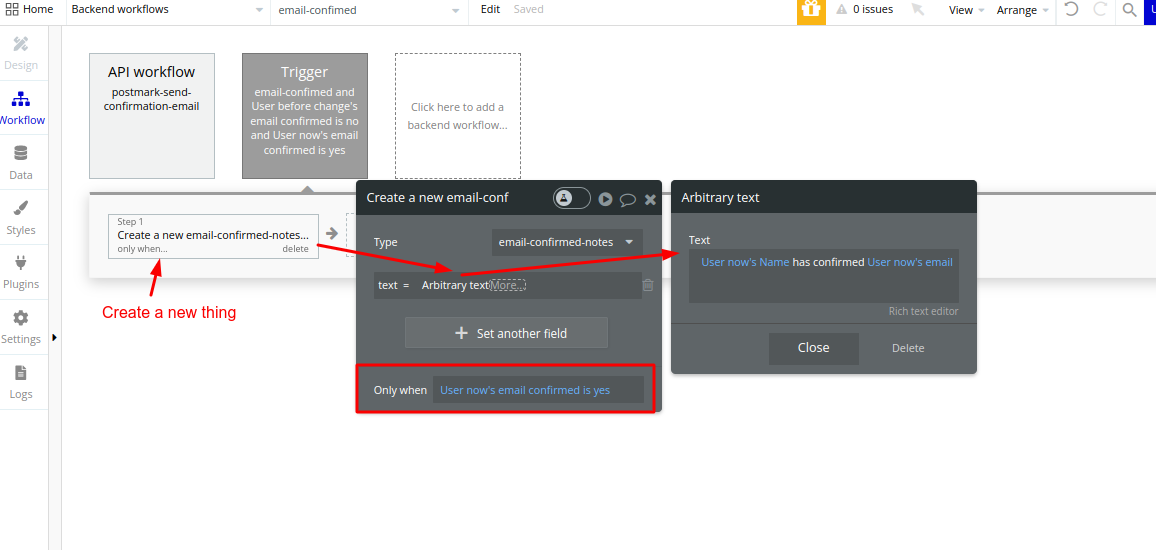
- Make sure to set the condition shown in the image below

- Create text messages in the database to keep a log for all the email-verified users
Now you might have a question:
Why use the Backend workflow for sending email?
Creating a backend workflow for sending a confirmation email in Bubble.io is a best practice to ensure a secure and controlled email confirmation process. The primary reasons for using a backend workflow include security, reliability, and the ability to execute complex tasks on the server side. Let’s explore these reasons in more detail:
-
Security:
- Preventing Client-Side Manipulation: By executing the email confirmation process on the server side (backend), you reduce the risk of client-side manipulation. This is important for tasks like email confirmation, where you want to ensure that the confirmation process is secure and cannot be easily tampered with by users.
-
Reliability:
- Consistent Execution: Backend workflows in Bubble.io run on the server, providing a more reliable environment compared to client-side workflows. This ensures that the email confirmation process consistently executes as intended, regardless of potential variations in users’ devices, browsers, or network conditions.
-
Complex Tasks:
- Access to Server-Side Actions: Backend workflows allow you to access server-side actions that may involve more complex processes, such as interacting with external APIs (e.g., sending emails through a third-party service like Postmark), updating multiple data types, or executing conditional logic based on server-side data.
-
Performance:
- Offloading Processing Load: Backend workflows help offload processing load from the client side, contributing to a better overall performance of your Bubble.io application. This is particularly important when dealing with resource-intensive tasks, such as sending emails, that might impact the user experience if handled on the client side.
Frequently asked questions
Why use Postmark instead of Bubble.io's built-in email for verification?
Three reasons. First, deliverability: Postmark is a transactional-email specialist with high inbox-placement rates; Bubble's built-in sender uses a shared domain and often lands in spam. Second, branding: Postmark lets you send from your own verified domain (you@yourapp.com) with custom templates, logos, and From-name, while Bubble's built-in email uses a generic Bubble sender. Third, observability: Postmark's dashboard shows you delivery status, bounces, opens, and clicks for every email, which is critical when a user complains they did not receive the verification email.
How do I generate an email confirmation token in Bubble without sending an email?
Use Bubble's native "Send confirmation email" action and check the "Just make token, don't send email" checkbox. The action returns a confirmation token you can reference in a later workflow step (Result of step N's confirmation_email). You then build the verification link manually as https://yourdomain.com/your-confirmation-page?confirmation_email=Result of step N, embed it in your Postmark template, and Postmark sends the email instead of Bubble. The user clicks the link, the page reads the confirmation_email URL parameter, and Bubble verifies the token and marks the user's email as confirmed.
Why use a backend workflow for sending verification emails?
Four reasons. Security: backend workflows run on Bubble's server, so the Postmark Server Token and email-sending logic never touch the client and cannot be manipulated by the user's browser. Reliability: server-side execution does not depend on the user's network or browser quirks, so the email goes out even if the user immediately closes the tab. Complex tasks: backend workflows can chain multiple actions (token generation, email send, database log) atomically. Performance: offloading the work from the client keeps the signup form responsive. For any production app, sending emails from a page workflow is a footgun.
What is the verification link format for Postmark + Bubble?
The standard pattern is https://yourdomain.com/
How do I track which users have verified their email in Bubble?
Use Bubble's database triggers. Create a backend workflow with a "New database trigger event" tied to the User type, and set the condition to "Only when User now's email confirmed is yes and User before's email confirmed is no" (this fires exactly once when the flag flips). In the trigger, append a row to a logging data type with the user's name, email, and a timestamp. The result is a verified-users log you can query for analytics, customer support, or compliance audits without polling the User table directly.
Can I use the Bubble API Connector instead of the Rich Postmark Emails plugin?
Yes, and for production apps the API Connector approach is often cleaner because it avoids the plugin dependency. Configure a Bubble API call to POST to api.postmarkapp.com/email with your Server Token in the X-Postmark-Server-Token header, JSON body containing From, To, Subject, HtmlBody, and TextBody fields. Mark the Server Token parameter as private in the API Connector so it stays on the server. The plugin is faster to set up; the API Connector gives you full control over template variables, attachments, and any Postmark feature the plugin has not exposed.